


Skys of FL are like nothing else.
I never saw anything even similar at any other place.
I can talk a lot about it, but I can do better then that and just share with you what did I see .
Skys of FL are like nothing else.
I never saw anything even similar at any other place.
I can talk a lot about it, but I can do better then that and just share with you what did I see .

Yesterday, before we left FL, I did some late evening Plein Air Sketching.
It turned to be a one I actually liked, so I took a picture of it.
Palm Trees
Black Canson paper.
Pastel Pencils (Kooh-I-Noor)


www.smashingmagazine.com

And below- begining stage of new painting in Soft Pastels. I'm going to take my time with this one, because I need to finish few Oil Pastel paintings first, but I just had to try it!
And finally I finished that very OP painting... and few others!.. And Now I'm back to this one and really want to have it done ASAP, it is already sitting around way too long.

Here is a next update to it. I wish I can finish it today, but hard to tell, if I'll be able to do it. We will see.

And of course Irina managed to sneak on me with camera, while I was working on this one yesterday night. My normal workstation was busy with new Oil Pastels, so it was a kitchen table this time!... (1AM, I really don't care what table).

Now I'm finally back to this one...
Gorgeous greens!.. You bet! I wanted it so bad, so finally ordered some from different makes and in different shades... not us many, as I'm sure, many of you have, but I like my "green kit".
It this picture I like the most that very mossy green structure of stones and bright green lives. .. Water, of course too. So it is all about green a first place.
I'll be honest - I'm sort of afraid of this painting, very demanding... usually if I don't give up, those demanding things are coming to be the very best ones after all, but yes, I do afraid of them and sometimes have no idea what i'm doing right in the middle of my work.
Tonight I go some free time and went back to it. Mostly I'm working on the top right corner for now and moving from there left and down. Will post more updates us it will be ready. So far just a photo of my setup with a little progress on this painting.
Had to put it on my easel too. Came to the point that can not work with it flat. Oh, well!...


I'm under very strong impression that all I do lately is grooming of my dogs...
Till the glorious time when new kennel fence went up they all became look like muddy monsters... No comments here.
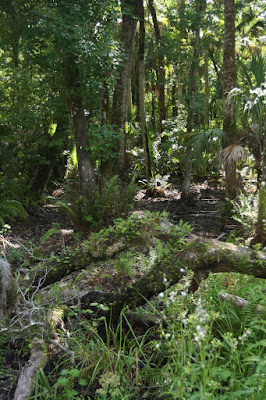
This evening I got Irina and camera and bunch of pastels and went out to the school in weak hope to catch some pictures of burning sky.
It was very pretty. We took some nice photos for future paintings and I spent whole 40 minutes working with plein air sketching of that sky and mountains behind. 40 minutes were all I had before it became dark.
I'm sort of disappointed with my Senneliers softies... some are not so softies and feels more like river rock and some... just totally wrong color. Fortunately I had few sticks of Mount Vision and it safe the situation... sky came out almost right. Greens on other hand... Well, see for yourself, here it is.
Their web site URL is: www.aswexpress.com .
Sale items are incuded Egerngy art grade oil pastel with very low price. 25 colors set is only $10, 50 colors is $19.60, 92 colors in wooden box (very nice box, I have one!) is only $59.99

1) Full size of this painting.

Unfortunatelly Colourfix coating didn't come out right, not smooth enough and not enough tooth on it either. Still - fun to work with. Hope to try my next small work on something different.
I call it finished.
Unfortunatelly only so much I can do with this support, but it is not too bad after all. Also I found out, that taking of good pictures of small art works is even more complicated that big ones!.. (here is a discovery!...:wave: :lol: )
It was a fun to work with this one.
Full size image 4 x 6 "

Enlarged fragment:

Time to figure out a frame for this one!

One more smal pastel work on Ampersand pastel board.
5 x 7 ", mixed soft pastels and pastel pencils.
Here is the original photo:

2) Photoshop.
Next, I open my reference photo is Photoshop and resize it to the actual format of this painting.
I don't do it every time, but this is exactly what I'm going to do with this one, since it is for demo purposes only. The size of this painting will be 5 x 7, so I'm formatting it down to this size.
Next, I'm using BURN brush (100%, shadows) to turn background dark, till all of it will be gone, just like I want to see that.

3) Choice of tools etc.
For this particular work I have chosen an Ampersand pastel board for its durability and other great qualities. I know nothing what I don't like about this support.
You can use any tools and solvents, when you working with it.
You can wash it under the running water, if you need it.
Colors are going on brilliant and looking great.
No problems with mounting and framing!
It is by far my support of choice, BUT... I wouldn't recommend you to use a watersoluble underpainting on it, since it will be feathering due the structure of this sand paper.

In fact on this very work I tried some gouache and even egg tempera - neither one was laying down on the way I wanted to see it, so I finished with using of Lyra pencils to complete my underpainting.

Sometimes I'm just putting underpainting and even sketching my future work as-I-go. At other cases, I use a transfer paper to transfer outlines of future work quickly and precise. It is up to your choice how you want to do it.

After I finishes underpainting, I started with first layer of actual Oil Pastels.
To spread them on a way I want most of the time I use silicon shapers #2 (firm) and occasionally soft. They come with different tips and in different sizes, once again - it is up to you, what you may like the best.

I also will use some sort of dental scaller or similar tool to get a small pieces off pastel stick and transfer it on my painting precisely where I need them to be.
My last tool will be a good sable brush or two, more likely in size #0, unless I need something bigger or smaller. Good quality synthetic brush will do just fine too.
Last step - choice of pastels. With this painting I'm working with combination of Holbein and Sennelier, because of their softness and great qualities.
4) Underpainting.
Just as I mentioned, after I transferred outlines of future painting on a pastel board, I started with underpainting, and did it in Lyra Oil pencils.

When I finished with Lyra, I washed background with Sable brush and Terpenoid Natural solvent to make it more even.

5) Painting.
After I completed underpainting,(what took a while, not because of this work is big, but just since we have a pretty busy time here) I found out that I have some amount of dust on it and had a brilliancy to attempt wash it out under the running water. Just like I mentioned at one of my previous postings, it works just fine, if you do it accurately with actual OIL PASTEL painting. Pencils however don't have that wonderful adhesive abilities what OPs do and you can wash them off just fine! What I almost did, but stopped right after underpainting started to come off. I did nothing, just let it dry. Then I went with first layer of OPs right over it.
I finished putting my general (sick) layer of OPs and spread it with shaper. I had to add some Senneliers, to make it look more like oil painting with all the structure of such (Holbeins are just a little bit too hard for it, when you work with small work, Senneliers do better trick with spreading). Then I washed the rose over with sable brush #0 and solvent to make sure that no part of painting is underpainting, but actual OP!.. NOW I CAN WASH IT, if it will be dusty again! :-)
You can see a work of shaper on background of painting, what I'll have to smooth better later on. As for now, picture needs some rest from me, so pastels will settle down a little and next layer will go on better, without mixing too much with initial one.


Another 5 x 7 painting of our local fields and mountains. Everything started blooming and looking so beautiful, that I just couldn't let it go. Started yesterday, finished today.
Mixed pastels .
Ampersand Pastel Board.